Lazy W Marie

Carpeing all the diems in semi-rural Oklahoma...xoxo

  • Welcome!
  • Home
  • lazy w farm journal
You are here: Home / Archives for recipes

araceli’s enchiladas verdes

February 12, 2021

If you are interested in a casual, authentic Mexican home cook’s version of enchiladas verdes, this is it. It happens to be our new son in law’s favorite dinner, too, so having it in our repertoire is great.

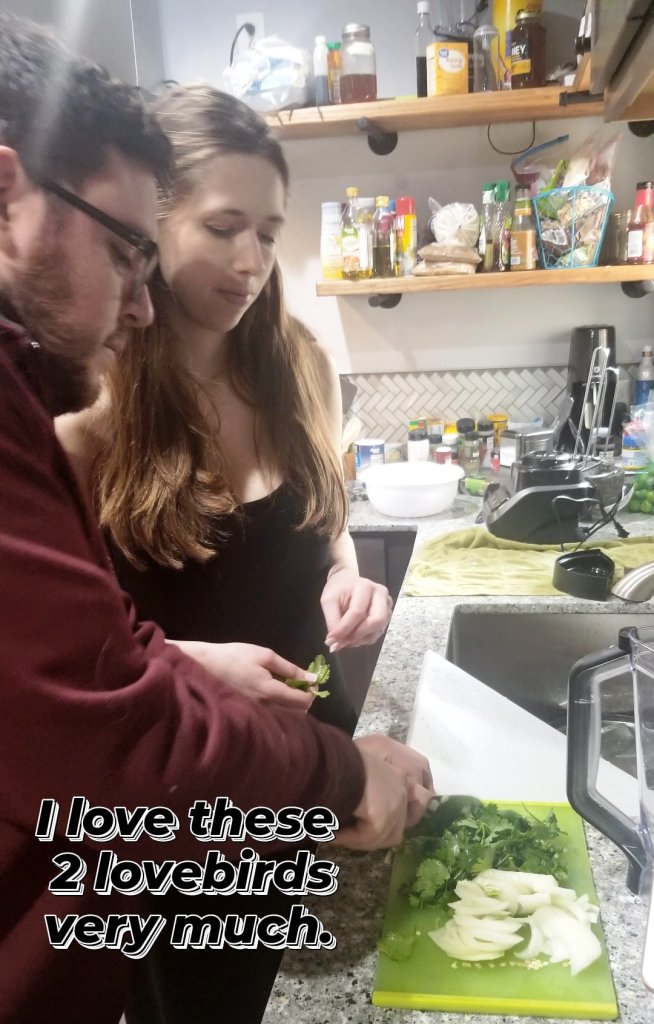
Araceli (Alex’s sweet Mom, the same lovely woman who taught me tamales one year ago and who is now family!!) taught Jessica to make it for our kids’ wedding dinnner; and a week later Jessica taught me. We had so much fun, and of course the finished product was fragrant and delicious, much better than anything you can get from even a very good restaurant.

What follows is more method than a precise recipe, though, so read through it for yourself then dive in! Araceli’s most pressing advice was to taste as you go.

Basic Ingredients:
* chicken meat, poached with onions, salt, and garlic
* several poblano peppers, charred
* chicken boullion cube, more onion & garlic, fresh cilantro
* can of “green chile” enchilada sauce
* lots of fresh tomatillos, removed from husk
* sour cream (about 1/2 cup)
* stack of fresh corn tortillas
* vegetable oil for frying
* good melting white cheese, like “oaxaca” or Monterrey Jack
* additional onions & cilantro for garnish

Prepare the Chicken First:
Poach several pieces of boneless chicken (we used breasts) with garlic cloves, salt, and large pieces of onion. Once the meat is cooked through and cool enought to handle, shred it, reserving the broth for making rice later.

Meanwhile, Prepare Sauce Ingredients:
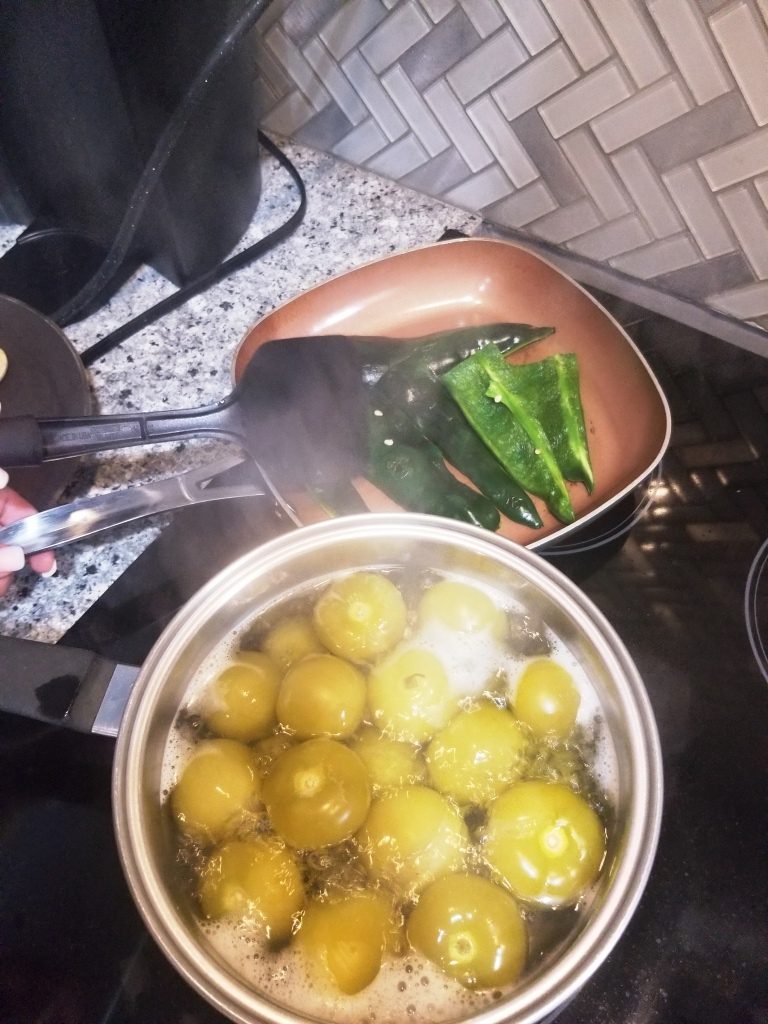
The bright green sauce flavor comes from cilantro, sure, but mostly from charred poblano peppers (slice and hull them first then cook aggressively in a hot skillet with scant oil or use an open flame or broiler to char the skins and soften the plump parts) and cooked tomatillos (remove husks then boil until they change color and begin to burst). Do the charring and the boiling while your chicken cooks, and gather your other sauce ingredients.

This recipe excited me so much I ordered tomatillo seeds for the summer garden.

Make the Sauce in a High Speed Blender:
(Also make sure your blender is heat proof. If it’s not, consider using an immersion blender or different method.)
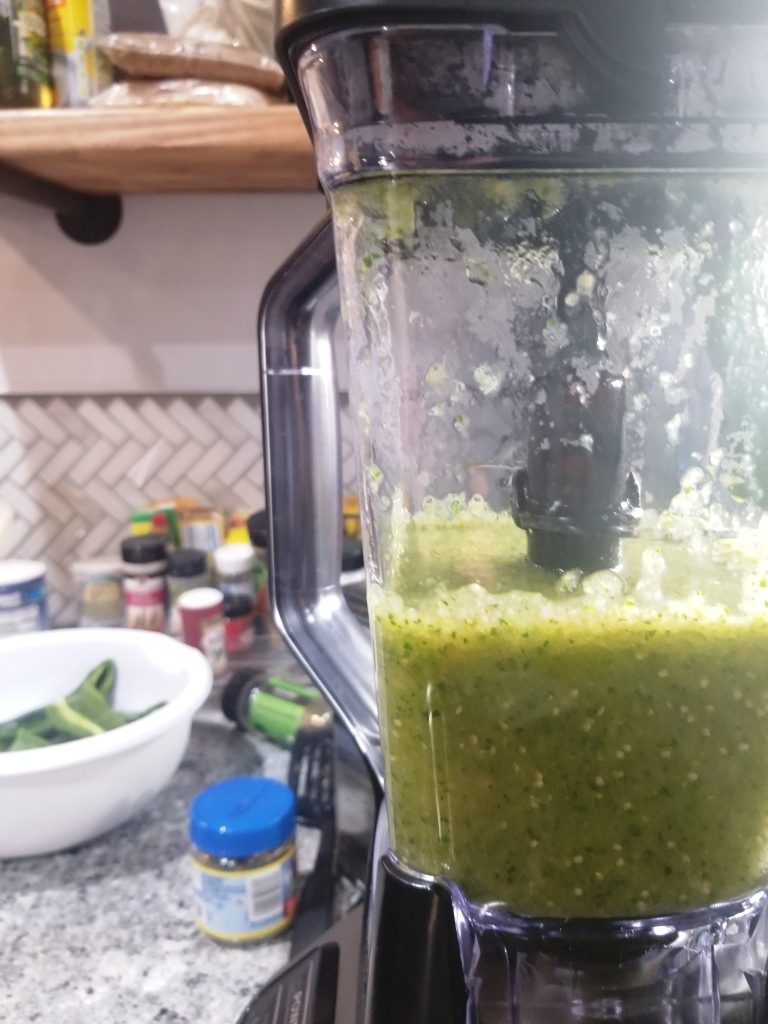
Working in 2 or 3 batches, blend together the sliced and charred peppers, the cooked tomatillos (these will be more yellow than green once cooked), chopped onion, bunches of fresh cilantro (stems partially removed), a can of verde sauce, and around 1/2 cup sour cream. Taste as you go. Add garlic, salt, etc. The sauce should emulsify and become a smooth, bright green color. The photo that follows is of the sauce before Jess added sour cream:

Green enchilada sauce: You will want to drink it from a straw, but resist. This is for dinner.

Prepare Assembly Line: Fry, Dip, Fill, Roll, Top, Bake.
* Consider assembling enchiladas with at least one other person. The process goes more smoothly, and it’s lots of fun! We worked from right to left, starting with a stack of corn tortillas, followed by the stovetop hot oil, then the green sauce for dipping, the bowls of chicken, cheese, and onion, and finally the prepared baking dishes for receiving the rolled up enchiladas. I believe Jess added more onions and cheese at the end!
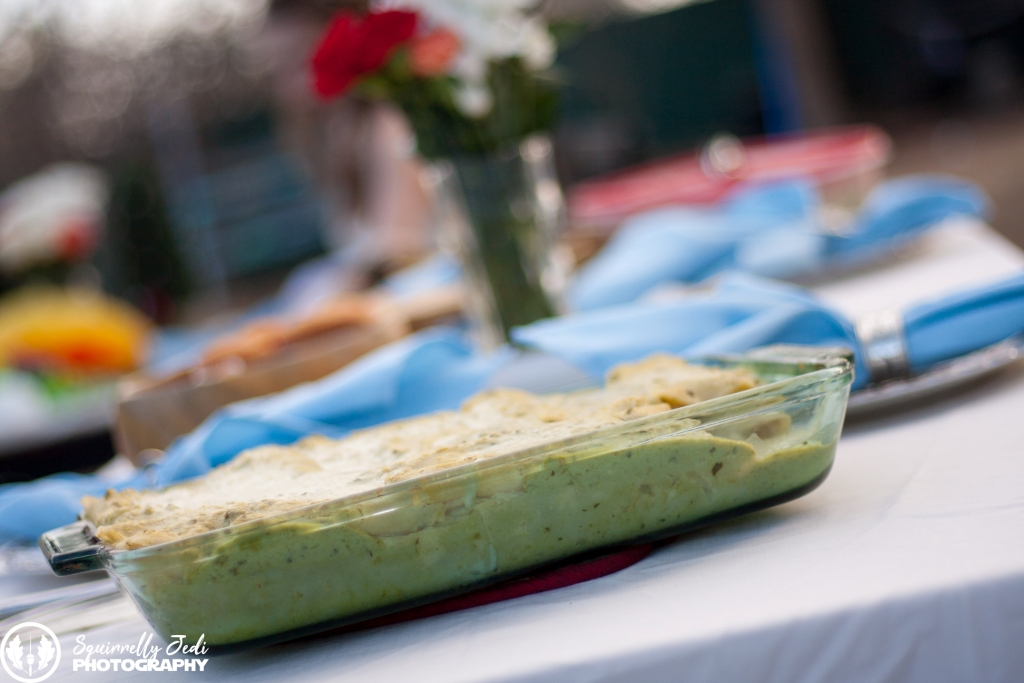
* The enchiladas will ultimately be rolled and placed snugly into a deep baking dish, which will go into a hot oven for melting. Prepare that baking dish (or a few, if you are making lots) and preheat the oven to about 350* F.
* Have green sauce ready in a bowl, along with seperate bowls of shredded chicken, lots of white cheese, and chopped onion.
* Heat a skillet or saucepan with vegetable oil, for soft-frying the corn tortillas.
* Play some fun music and make some memories!

Make Soft, Pliable Enchiladas:
* The secret to tender enchiladas turns out to be individually dipping the corn tortillas first in very hot oil (not long enough to make them very crispy, but long enough to get them bendy and hydrated with oil) then in the warm green sauce, all before filling. Filling cold tortillas would make for dry, cracked tortillas in the finished prodcut, which is no fun.
* Once each tortilla is dipped in hot oil then green sauce, it gets filled with scoops of moist chicken, some melt-worthy white cheese, and chopped onion. Tuck them seam side down, snugly in the baking dish.
* Pour remaining warm green sauce all over the uncooked enchiladas and top it all with remaining white cheese, more onions if you like.
* Bake until the cheese melts and is lightly touched with gold.
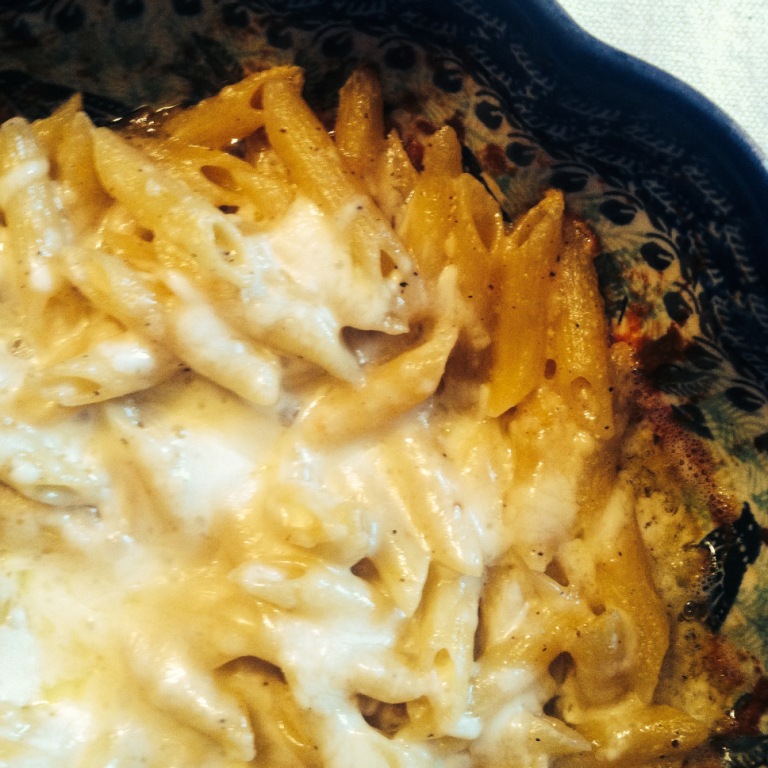
* Top with more cilantro, or tomatoes. Enjoy!!

We will be making these at the farm regularly, especially when fresh tomatillos and peppers are growing. If you know my husband, you might be curious how he likes green enchiladas. He loves them! Because he is allergic to onions, Araceli made a large batch of enchiladas sin cebolla just for him, for the wedding feast. So thoughtful! And of course when I make them here that’s what I’ll do, too.

Heartfelt thanks to my daughter for sharing her Mother in Law’s family recipe, and to Araceli for continuing to feed us all so well, with food and love.

Happy cooking, friends! And happy memory making and happy garden daydreaming!

“Give up the illusion that you can
throw Mexican food together.
Just understand that you are going to
have to make and take the time.”
~Denise Chavez
XOXOXOXO


Leave a Comment
Filed Under: UncategorizedTagged: araceli, cooking, enchiladas, family, Jessica, recipes

chicken pot pie from scratch

December 20, 2014

Friends, this is my favorite chicken pot pie. It’s the perfect comfort food for cold, dark days. (We’ve had so many in Oklahoma lately. So much fog!) It’s high in protein, so it’s satisfying. It’s fragrant, pretty to look at, filling, simple, and a crowd pleaser, I think because it’s full of plain, familiar flavors and it’s customizable.

Make some chicken pot pie this weekend! It's perfect refuel and soothe-your-nerves food for between all those Christmas errands. xoxo
Make some chicken pot pie this weekend! It’s perfect refuel and soothe-your-nerves food for between all those Christmas errands. xoxo Even better if you’re ready for Christmas and spending the weekend cuddling by the fire.


First Make Some Chicken:
If you already have some leftover chicken or turkey meat, use that! This is an excellent recipe for making good use of extra food without feeling like you’re serving leftovers. If not, cook up a few nice, big chicken breasts or a whole bone-in chicken. My favorite thing to do is cook it all day in the crock pot so the meat is tender and the house smells like home. Plus it renders you some extra wonderful broth which you’ll use later in the filling. All told you will need about 3 cups of cooked, shredded chicken meat. Season to your heart’s content, but err on the side of simple.

Optional? Potatoes:
Not always, but sometimes we like it extra hefty, extra starchy. Sometimes we are just so hungry! So on those night I first quarter then slice up 5 or 6 russet potatoes very very thinly. Microwave them until they’re mostly cooked. Save for the filling.

Prep Two Perfect Pie Crusts:
To me the crust will make or break the finished product. You do what you want, but I strongly and lovingly suggest this recipe:
Combine 2 cups flour with 1/2 teaspoon salt. Cut in 2/3 cup plus 1 Tablespoon of shortening and the same amount of cold butter. Use your very clean hands to flake it all together, then add 4 to 5 tablespoons of cold water, tossing with a fork. You know what to do from here, right? I divide into two parts, roll it out, and fold it gently to keep cool in the fridge while the other stuff is prepared. (Note: For extra credit, if you’re making a sweet recipe, you can add some sugar to the flour before forming the dough.)

Then Cook the Filling:
Melt 1/3 cup butter plus a little oil in a large skillet. Make a roux by sprinkling that with 1/3 cup flour and seasonings like salt and pepper, garlic powder, and nutmeg (not too much!). Stir it enthusiastically with a whisk or wooden spoon, ridding the mixture of lumps. Let it brown and bubble. Let it get silky.
Now to this gorgeous thin gravy base, add 1/3 cup milk and 1/3 cup heavy cream if you have it (2/3 cup milk if not, still delish). Also add 1 and 3/4 cup good chicken broth (this is where you could strain your droppings from earlier and use the broth). Season again, stirring, and cook at boiling for about a minute.
Now remove from heat and add in the cooked, shredded chicken meat and the potatoes if you opted for those. Stir it all together with the gravy.

Now Assemble and Bake:
I suggest using a nice, deep dish rather than a standard pie plate. My go-to is actually a scalloped casserole dish, maybe three inches deep.
Lay one of the cool, silky, pliable pie crusts on the bottom of your dish. Pour in the hot, savory chicken mixture. Bid it adieu because it’s about to be covered up forever. Top with the second perfect pie crust and flute the edges and cut a few steam vents in it. Now I like to brush the top with a wash of one beaten egg and a little milk. Salt it lightly and bake at 425 degrees for about half an hour.


ckn pot pie


Like any pie fresh from the oven, let it sit for a few minutes before cutting in. Then allow your knife to crunch into the strong, tender, flaky crust and sink through the steaming middle. The bottom crust should pop up off the dish easily and give you a truly perfect slice of supper. So very good, friends. So hot and delicious and filling. And I doubt very much you’ll have any leftovers.

Other ways to customize: 
We don’t do this here at the farm, but certainly you could add diced carrots, frozen peas or whatever else you want. Maybe a little cheese? But honestly this is one of the few recipes I like to keep really, really simple.

I hope you try it and enjoy! Merry final-Christmas prep making!

Teach Me How to Dougie
XOXOXOXO


1 Comment
Filed Under: recipesTagged: chicken pot pie, pie crust, recipes

lazy w pizza crust

December 7, 2014

Raise your hand if you love pizza! Raise both hands if you love homemade pizza! Homemade pizza is one of my favorite meals to arrange here at the farm. We no longer do it every single week, but we do it plenty. I love the fact that on pizza night everyone can eat exactly what they want, it makes the house smell amazing, and the whole process slows us down a bit. Pizza day is always fun!

This beautiful woman is my friend Melissa. She is one of the most avid readers I know (three cheers for our Oklahoma book club!) and loves homemade pizza almost as much as I do. Hi Melissa!


Toppings are simple and completely up to you. Here at the W, we always make two sauces: Heavy, salty Alfredo in one pot and slow-simmered, sweet and garlicky marinara in another. (Sometimes I mix mine into a pink sauce.) Then we offer chopped grilled chicken breast (amazing with Alfredo), some raw veggies and herbs (I vote for mushrooms, basil, and parsley whenever possible), maybe jarred olives and artichokes, and sometimes pepperoni, ground Italian sausage, etc. And of course mozzarella and parmesean cheeses.

The details totally depend on our group that night. Have you tried Edie’s son’s version with honey and garlic? Delish. Often guests are happy to bring fun toppings to share, too! This is one of the coolest pot luck strategies in my opinion: “I’ll make a ton of dough and sauce, and y’all bring toppings!” Instant party.


lazyw pizza dough, recipe, pizza reicpe
When our oldest daughter comes home for pizza night, she tends to fill one crust to the max and flip in over into a big, billowy calzone. It looks so good! But she’s tiny and eats like a bird. So guess who always takes leftovers with her?

If toppings are the paint, then crust is the canvas. Excellent pizza really relies on excellent crust, doesn’t it? After trying several recipes and methods over time I have finally settled on a certain combination that all of us love. It’s tender, hand-tossable, easy, and reliable. My book club girls have been requesting this recipe, and I might as well put it here on my blog in case the crispy, wrinkled recipe pages where I’ve been taking notes over the years ever finally bite the dust.

Okay. My favorite pizza crust is basically from a slightly tweaked Betty Crocker recipe.

Ingredients:

5 to 6 cups all purpose flour
2 Tablespoons sugar
2 teaspoons salt (I admit to a psychotic addiction to sea salt)
4 1/2 teaspoons of yeast (or 2 envelopes)
6 generous Tablespoons of olive oil
2 cups very warm water (see notes below for a REALLY cool trick)
optional: garlic powder and dried Italian spices to taste

Now, Method:

  1. First bring some water to boil in your tea kettle. When it is really whistling, measure into a heatproof measuring bowl one cup of boiling water, then add to that one cup of cold tap water. The half-and-half combination will give you precisely the right temperature you need to activate and grow your yeast, without needing a thermometer or endless water corrections. It’s magic. Kitchen magic, I tell you! (In case you want to check, the yeast needs water that is 120*-130* F)
  2. Now in a large bowl, whisk together 2 cups of the flour with all of your sugar, salt, and yeast. Using nothing more than a wooden spoon (I mean you could use an electric mixer, but let’s be Amish!), stir in the olive oil and magical warm water. Be sure to scrape down and incorporate all the dry stuff. At this stage, if you want fancy dough, add garlic powder and Italian spices too. It’s truly wonderful with or without.
  3. Now add enough of the remaining flour to your dough to make it nice and soft (I err on the side of less, since you’ll generously dust your working surface later). Betty Crocker says the dough should begin to leave the sides of your bowl.
  4. Dust your working surface with more flour and knead the whole fragrant, malleable heap of goodness with your bare hands. Knead it for several minutes, until it’s “smooth and springy” Ms. Crocker advises. The transformation is just beautiful. It feels sexy in your hands. But, in an Amish way. Totally wholesome.
  5. Now leave the giant ball of heavy, yeasty, silky dough in the same large bowl and cover lightly. You can use plastic wrap or maybe a clean, damp cotton tea towel. It’s only going to rise once, unlike lots of breads, and only for half an hour. And honestly I feel like thin crust is the way to live your life. So if it doesn’t rise to the sky that’s fine. But if you want it really thick and poofy, then make sure your dough is kept warm somehow. I always use an oven proof glass bowl just in case I feel the need to slip it into a barely warm oven (less than 200*).

The Fun Part! and extra notes:

  1. Okay, now the dough becomes a crust! I’ve given you the proportions for a double recipe, which is actually four good sized pizzas. So tear it apart once, then again, so you have four similar hunks of smooth, springy dough.
  2. Each one can be handed to its potential toppings artist for hand-tossing, rolling, or just pressing onto a pizza stone or greased cookie sheet. Instruct each other to speak with bad Italian accents as you work.
  3. By the way, for a really cool restaurant effect, use a drizzling of olive oil and a sprinkling of corn meal on your pan.
  4. If you’ve made more dough than you need, just pop it into a freezer bag and seal well for the next pizza party.
  5. For thin crusts, make sure to roll or toss it even thinner than you think you should, then pre-bake at about 400* for less than 10 minutes. It won’t come out crisp yet, but after you top it and bake it again? Perfect.
  6. For thick crusts, don’t handle it much more. Just shape it and let it rise once more on the stone or cookie sheet.
  7. Either way, once you’re ready, top it all to your heart’s content with everything that pleases your pizza-loving soul.
  8. For book club recently, I rolled some dough extra thin, topped it with marinara, cheese, and pepperoni, rolled it up, brushed the outside with egg wash and added Parmesan, then sliced it crosswise like you would cinnamon rolls. Cook slices on their sides for really yummy pizza roll ups!
  9. Okay, traditional pizzas just go in a hot oven until cheese is melted. Thin crusts only take about 10 minutes at maybe 425*, thick crusts take up to 20 minutes at 375*.

pizza

Friends, I’m telling you, there are two ginormous slices of leftover homemade pizza in my refrigerator right now. I’m not hungry. Not at all. But after talking to you about this I am giving serious consideration to eating that stuff cold.

Cold pizza, family, and friends who love books. Life is good.

“You better cut the pizza in four pieces
 because I’m not hungry enough to eat six.”
~Yogi Berra
XOXOXOXO

2 Comments
Filed Under: book club, daily life, recipesTagged: pizza crust, recipes

fancy hotel chocolate chip cookies

August 29, 2014

Have you ever stayed at a nice hotel where in the afternoon they give you an over-sized chocolate chip cookie, and perhaps it is gently warmed, and most likely it is nestled inside its own brown paper envelope, as if they made the entire batch with you in mind? I have. And the experience is divine. I am telling you right now: If you are a hotel that offers Afternoon Cookie Service, you barely need a pool; you are already my favorite. (But please still have coffee.)

fancy cookies bite

I have goofed around with lots of chocolate chip cookie recipes over the years, leading up to that really fun taste test we hosted a while back. Handsome has his favorites and I have mine. But this? This is borne of a desperate baking moment. I discovered in my pantry a weird collection of extras that didn’t quite match any of our recipes. I tried it anyway, and BAM. Fancy hotel cookies. Like, exactly. Here it is.

Ingredients:

2 sticks real butter, softened
3/4 cup white granulated sugar
3/4 cup packed brown sugar ( I like dark)
2 large eggs (farm fresh, because I grew up with Martha Stewart & Ina Garten)
1 1/4 cup all-purpose flour
1 cup quick oats (ground up)
1/4 cup pecans (also ground up, not just chopped)
1 teaspoon baking soda
at least 1 teaspoon good vanilla
1 whole bag of semi-sweet chocolate chips or 2 cups chopped semi-sweet baking chocolate

Prep Work:

Allow butter to soften to about room temperature
Use coffee grinder to grind up the quick oats & pecans (pecans will almost become a paste)
Play music like Iggy Azalea’s I’m So Fancy or, if you’re feeling old school, Reba McEntire’s Fancy

These cookies turned out so tender, so chewy and densely chocolatey, so vaguely flavored of pecans (without the crunch) and just perfect in every way, that I kind of felt fancy. Like I was eating an afternoon hotel treat. So I scrubbed all the tile in our house with bleach, to get that hotel bleachiness. And I played soft jazz. And fluffed the throw pillows and swept the front entry and Windexed all the glass. I changed our bed sheets and folded the tissues into roses.

Then I panicked because we didn’t have reservations, and who would feed the animals while we are out of town? Then a rooster crowed outside the kitchen window and I remembered I was safe at home. Not at a fancy hotel. But the diversion was vivid and lovely.

Assembly: It’s easy & nothing different, once you’ve ground up the oats and pecans.

Cream together the butter and sugars
Mix in the eggs and vanilla
Use a fork to stir together the dry ingredients (including the almost pasted pecans)
Mix those into the egg-butter-sugar loveliness
Stir in the chocolate pieces
Scoop and roll dough into extra large balls (maybe 2 or 3 Tablespoons?)
Bake until just the edges are browned
Allow to cool then devour

crushed pecan chocolate chip cookies

Will you try this? What is your favorite chocolate-chip cookie strategy? What do you love most about fancy hotels?

I am linking this recipe post to the Oklahoma Women Bloggers page, where every Friday these wonderful ladies collect a different type of recipe. It’s a creative spin on Progressive Dinner Parties, and I love it! This week, desserts. Go see the other yummy ideas!

********************

Today is Handsome’s 39th birthday. Around here, perhaps you’ve noticed, we do birthday weeks. He’s already celebrated with his office family, and this weekend I intend to spoil him rotten and hope lots of friends can join in. It’s his first birthday without his Mom, and so many other family changes since her passing have made the grief sharper, more bitter. I would really appreciate you lifting him up in prayer this week. Thank you friends. I know you will.

XOXOXOXO


7 Comments
Filed Under: daily life, recipesTagged: cookies, hotels, recipes

our most favorite alfredo

August 21, 2014

I have loved alfredo sauce since I was a little girl, beginning with a shrimp-and-pasta dish I ordered at Red Lobster in maybe fourth grade. My friend Amber and I shared a birthday dinner there. We also wore matching plaid pleated skirts. I used those bendy rods to curl my hair and she wore real Keds. It was awesome. The alfredo flavor and creaminess left a lasting impression on me, and thereafter I ordered it at every single restaurant where I found it on the menu.

Around the third year of our marriage I learned to make it myself and played around with the details until Handsome and I became I am obsessed with the final product. He loves it. He craves it, asks for it, and moans and shivers when it appears on his plate. It is so simple to make but absolutely decadent. Cheesy, salty, thickish, creamy… And it pairs with everything. You can eat it on skinny little angel hair noodles or drizzled over savory filled crepes. It tastes amazing with grilled herbed chicken breast or seafood or, as we enjoyed it tonight, steak.

alfredo plate


Alfredo is probably our top choice for pizza sauce at the Lazy W, too. But the way we eat it is a far cry from the jar of thin white sauce you can buy on the pasta aisle. I have to admit, this is also light years ahead of what Red Lobster serves. Here’s our recipe.

A couple of notes: This comes together really quickly, so I suggest prepping the other elements of your meal first. The sauce tends to separate if you let it sit out too long. Also, the butter and two cheeses in the recipe make it pretty salty already, so I do not add any salt. And I am a bonafide salt FREAK. So there you go. Lastly, the following measurements yield about 2 cups of sauce, which because of its richness is more than it sounds like. And the whole thing quadruples well. Not that I ever quadruple anything for two people. That would be crazy.


alfredo ingredients


Basic Alfredo Sauce:

saute a little minced garlic in olive oil

add one stick of real butter and one half cup of heavy whipping cream

heat it almost to bubbly and as it blends and thickens, season with pepper and nutmeg

then remove from heat and add 1/2 cup parmesean cheese and 1/4 cup of mozzarella cheese

stir it all really smooth with a wooden spoon and add immediately to your base dish (noodles, etc.)


And that’s it! Quick and simple.

Tonight I folded the aflredo saucein with about 10 ounces of penne pasta noodles, cooked not even to al dente. The noodles still had lots of bite left in them when I pulled them from their boiling water, because I wanted to finish it all off in the oven while our steaks were cooking. For the final few minutes of baking I sprinkled some extra mozzarella cheese on top. Just because.


rich alfredo sauce baked with penne pasta


How about you? Are you an alfredo aficionado? How else could you serve it with? What yummy recipes from your childhood are still fixtures in your life?

Thanks Mama Kat for a fun prompt! It totally helped me decide our side dish tonight.

mama kat image

Mama Kat’s Losin It


17 Comments
Filed Under: daily life, Mama Kat, memories, recipesTagged: alfredo sauce, pasta, recipes

Hi! I'm Marie. Welcome to the Lazy W. xoxo

Hi! I’m Marie. This is the Lazy W.

A hobby farming, book reading, coffee drinking, romance having, miles running girl in Oklahoma. Soaking up the particular beauty of every day. Blogging on the side. Welcome to the Lazy W!

I Believe Strongly in the Power of Gratitude & Joy Seeking

Pages

  • bookish
  • Farm & Animal Stories
  • lazy w farm journal
  • Welcome!

Lazy W Happenings Lately

  • her second mother’s day May 10, 2025
  • early spring stream of consciousness April 3, 2025
  • hold what ya got March 2, 2025
  • snowmelt & hope for change February 20, 2025
  • a charlie and rhett story February 13, 2025
"Edit your life freely and ruthlessly. It's your masterpiece after all." ~Nathan W. Morris

Archives

May 2025
M T W T F S S
 1234
567891011
12131415161718
19202122232425
262728293031  
« Apr    

Looking for Something?

Theme Design By Studio Mommy · Copyright © 2025

Copyright © 2025 · Beyond Madison Theme on Genesis Framework · WordPress · Log in